Setting up Zoiper for Android devices
Install Zoiper app from Play Store Android
- by using this link https://play.google.com/store/apps/details?id=com.zoiperpremium.android.app&hl=en
or
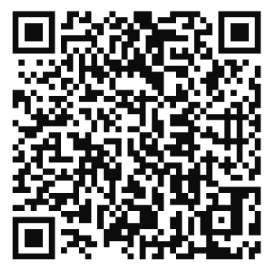
- this QR code
Configure the app to make and receive phone calls
1. Start the application
You will see the following screen
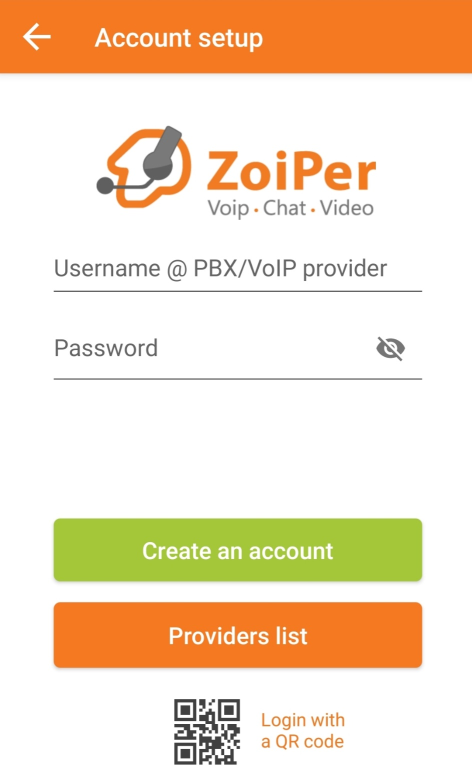
2. Please make sure that you have the User/Host and Password configuration data available.
Example of User/Host: your-name@company.while1.biz
PLEASE NOTE! the above data is an example
If you have not received this data please contact the person responsible for PBX within your organization (the PBX admin)
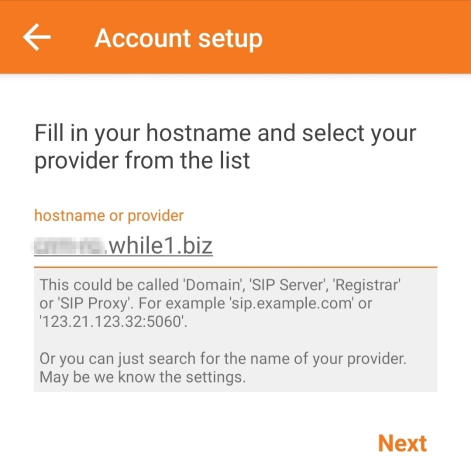
3. Fill in the User/host and Password provided as shown in the image below
PLEASE NOTE! the data below is an example

4. Click on "Create an account" to continue.
Please make sure that the data has been filled in correctly, in uppercase and lowercase letters.

5. In the next window, click "Next"
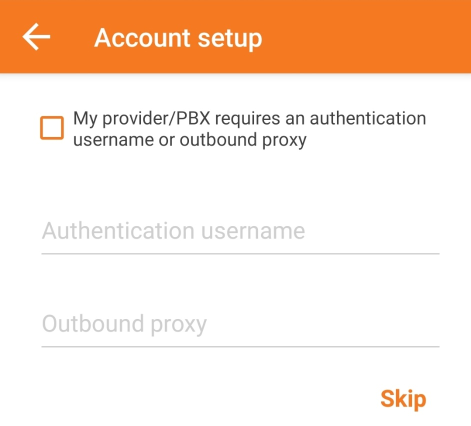
6. In the next window, press "Skip"
7. Wait for the application to perform the verification.
Configuration was successfully performed if, at the end of the verification, the SIP UDP protocol is green as in the next image.
The other protocols (SIP TLS, SIP TCP, IAX UDP) are not used by our PBX.
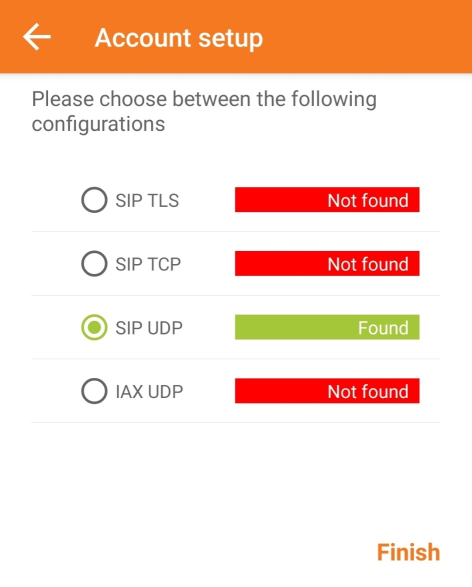
8. Press Finish to finish the setup
9. Congratulations, the configuration was successful!
Now you can use the Zoiper app to make your first calls.
Q & A
Question - What do I do if at the end of the checking, all the values are red, as in the image below?
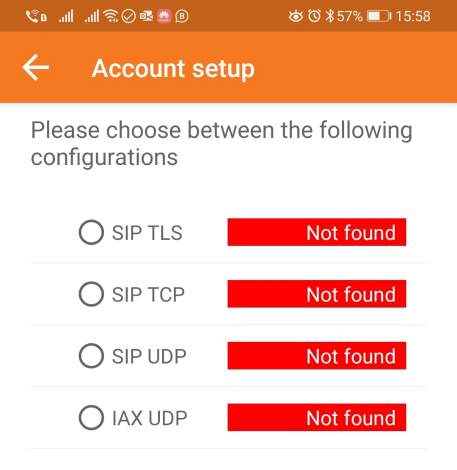
Answer 1 - Please check if the IP address from which you connect has been confirmed in the PBX, more information here https://support.while1.biz/projects/while1-voice-ro/wiki/Confirmation_IP
Answer 2 - Please make sure you have correctly filled in User/Host and Password, using the data exactly as provided, in uppercase and lowercase.
Available in other languages: RO