Voice mail settings
Callers can leave voice mails in PBX, in 3 situations:
1. Voice mails sent via IVR menu
When navigating in an IVR menu, by pressing the key associated with the Voice Mail option, the caller will be informed of the steps to follow in order to leave a voice mail.
How to configure the option Voice Mail in an IVR menu:
- Select section PBX/IVRs
- Click on IVR's name in which you want to insert the option and then click on Edit menus OR create a new IVR (Create new IVR) and then click on Edit menus
- In the Edit Menu Page assign the desired label (Voicemail) to a key and set the necessary fields:
Sound file = select the prerecorded sound file, that will be played to the caller before pressing a key
Play = check this option in ordet ot activate message to be played in IVR's intro
Type = context (the variable type defines the type of action when pressing the key; the context function will be dialed, function for which there are by default different types of contexts)
Destination = record-message (defines the action triggered by pressing the key)
The syntax must deliver information about "the type of context, extension, priority"; contexts are set by default in PBX and in this situation the context used is record-message.
Optional: other settings regarding assigned voice mails
Email = fill in the email address to which the voice messages will be sent
Variables = variables that can be set for voicemail:- VM_INTRO_MESSAGE=vm-intro-custom (intro message: Please leave your message after the sound signal ... it can be replaced with a custom message)
- RECORD_MESSAGE_SKIP_THANKYOU=1 (cancel the Thank you message at the end)
- VM_REVIEW_MESSAGE=vm-review-custom (Press 1 to send a message, 2 to listen again, 3 to re-record ... it can be replaced with a custom message)
- RECORD_MESSAGE_SKIP_REVIEW=1 (cancel the VM_REVIEW_MESSAGE message)
Please note!
If the variables are set at the submenu level, they will also be inherited by the upper/previous menu that has no variables set.
If the menu with defined variables is not set as the final destination (eg: record-message), the same variables must be set in the other menus, as empty variables (VARNAME= )
- Click on Save menus to save the changes

2. Sound Files played Outside Working Hours (via Inbound routes)
When the caller calls a certain number outside working hours, they can listen to an announcement telling them how to leave a voice mail at the end of the call.
In order to use this option, you need to:
- Record the audio announcement that informs the caller that they called outside working hours, as well as the announcement regarding the sending of voice mails, both in .wav format.
- Upload the two sound files in (PBX/Sound files)
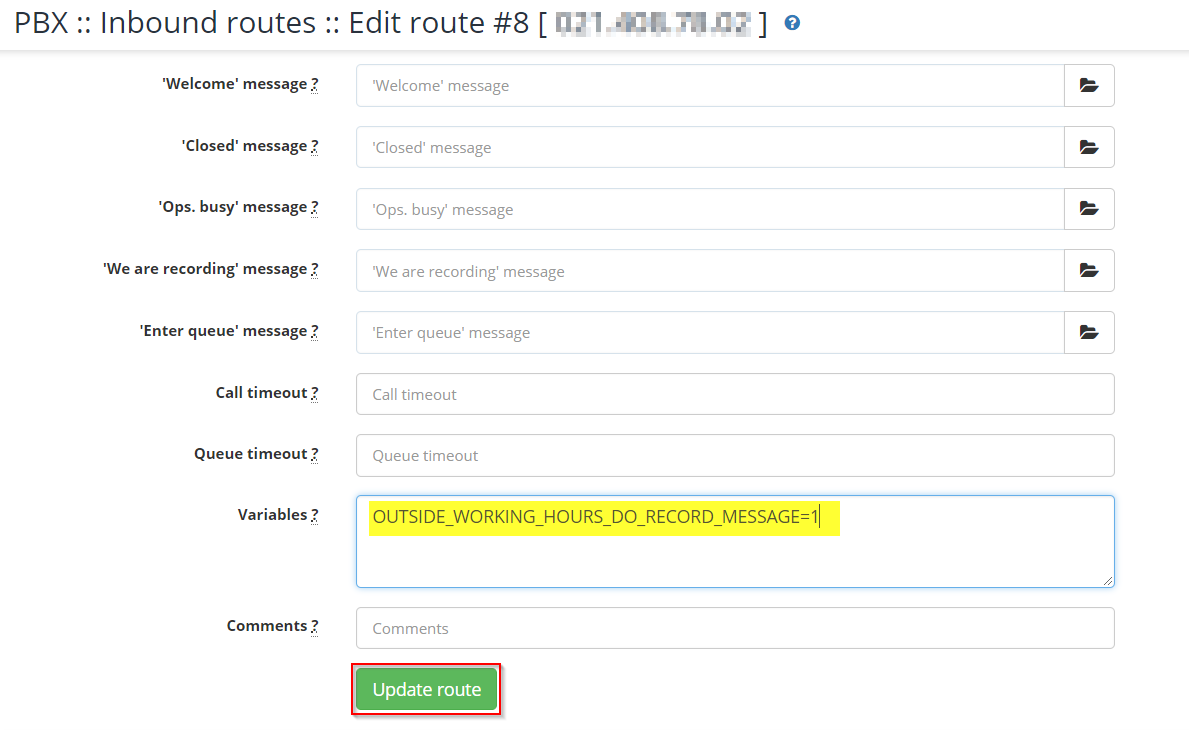
- Edit the route you want in order to allow voice mails to be taken outside working hours, as follows:
- Select PBX/Inbound routes
- Click on the name of the route you want or create a new one (New route)
- Display the form in advanced mode in order to show the field Variables
- Fill out the field Variables: OUTSIDE_WORKING_HOURS_DO_RECORD_MESSAGE=1
- Fill out the field VoiceMail Email with the email address that you to receive notifications regarding received voice mails
- Fill out the field 'Closed' message with the sound file name informing the caller that they are outside the working hours, together with the sound file informing the caller that they can leave a voice mail. (example on how to complete the field: closed_10_18&sufix_vm )
- Click on Update route
3. Voice mails sent before leaving a queue
When the caller calls during working hours and are placed on hold in a queue, an announcement can be played to let them know that they can leave the queue and leave a voice mail, before the call ends.
In order to activate this option, it is necessary to:
- Record the custom sound file (in .wav format) that announces the possibility of leaving the line by leaving a voice mail
- Upload the sound file in the interface, according to the instructions in section Sound files
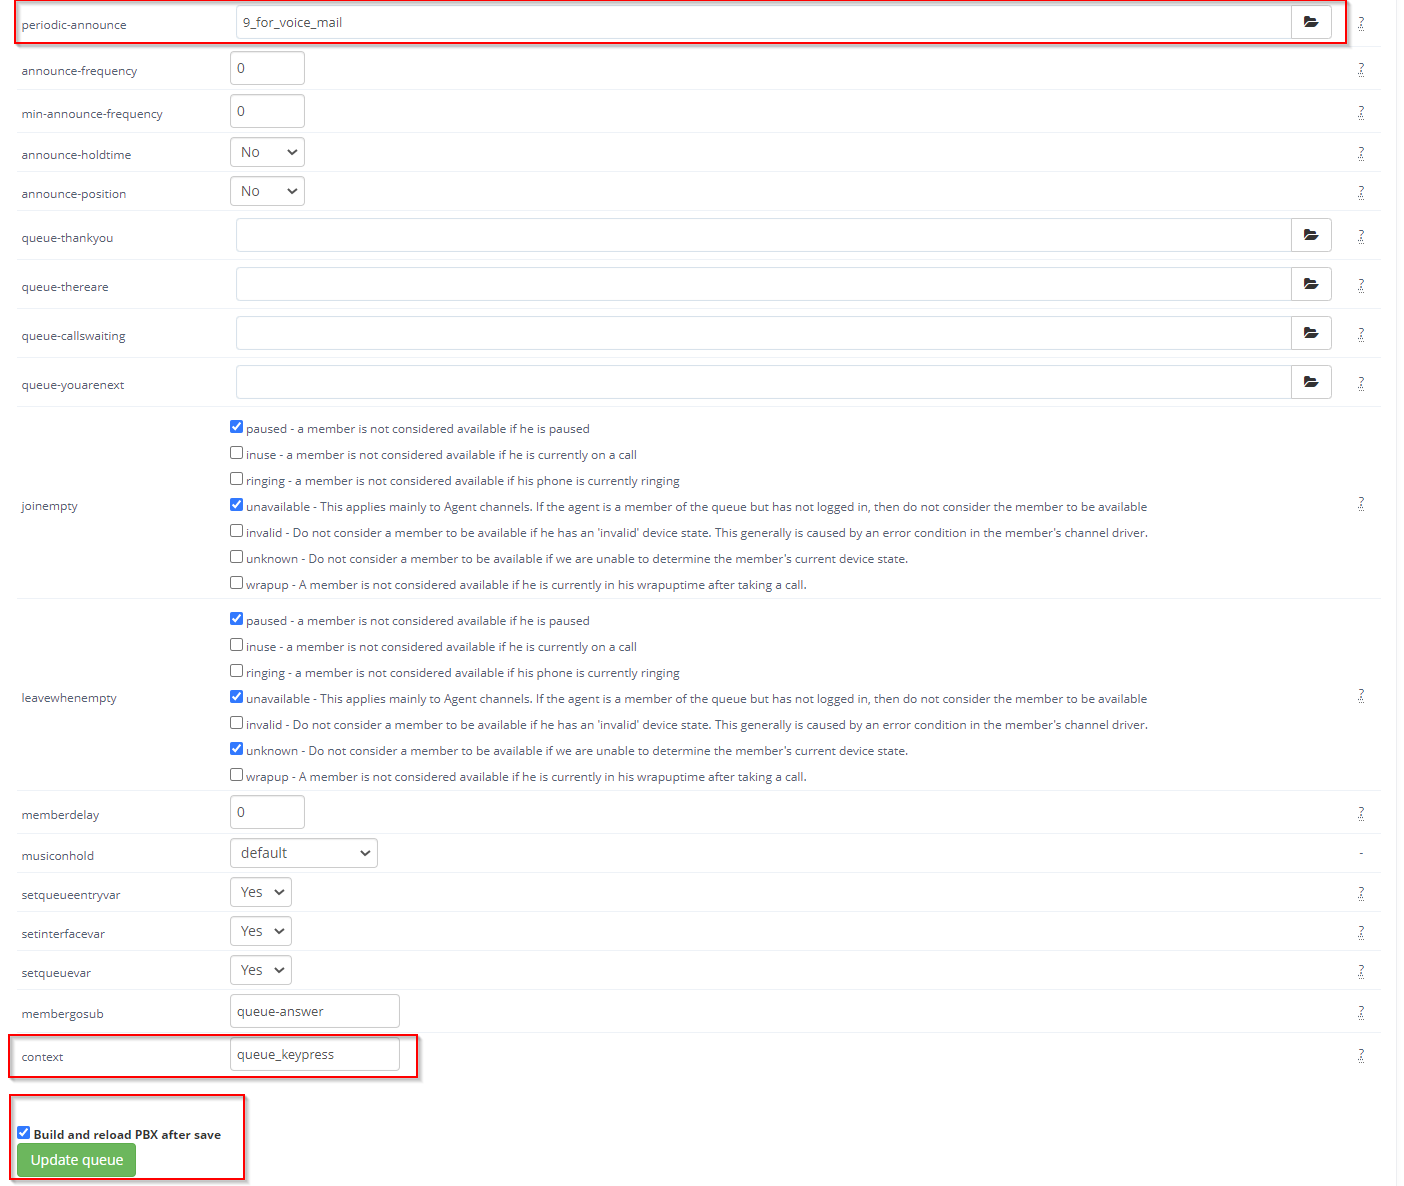
- Select the Queue you want (PBX/Queues/Edit Queue) OR Create a new One (PBX/Queues/Create new Queue):
- Fill in the value of the variable periodic-announce = select from the list the sound file name that you have previously uploaded
- Fill in the value of the variable context = queue_keypress (see details in How to define subroutines or special functions)
- Check the option Build and reload PBX after save
- Click on Update queue
Voice mails can be listened to in section Call Detail Records.
Available in other languages: RO